Exporting Workflow Event History to AWS S3
Prerequisites
Before configuring the Export Sink, ensure you have the following:
- An AWS Account with write permission to an S3 bucket.
- An AWS S3 bucket.
- The S3 bucket must reside in the same region as your Namespace.
- (optional) A KMS ARN associated with the S3 bucket.
Configure Workflow History Export
How to Configure Workflow History Export Using Temporal Cloud UI or tcld
You can use either the Temporal Cloud UI or tcld to configure the Workflow History Export.
The Temporal Cloud UI provides two ways for configuring Workflow History Export:
- Automated setup (recommended): The Cloud UI launches the AWS CloudFormation Console to create a stack, with write permission to the S3 bucket.
- Manual setup: The Cloud UI provides a CloudFormation template for users to manually configure a CloudFormation stack.
Using Temporal Cloud UI
The following steps guide you through setting up Workflow History Export using the Temporal Cloud UI.
Don't forget to click Create at the end of your setup to confirm your export.
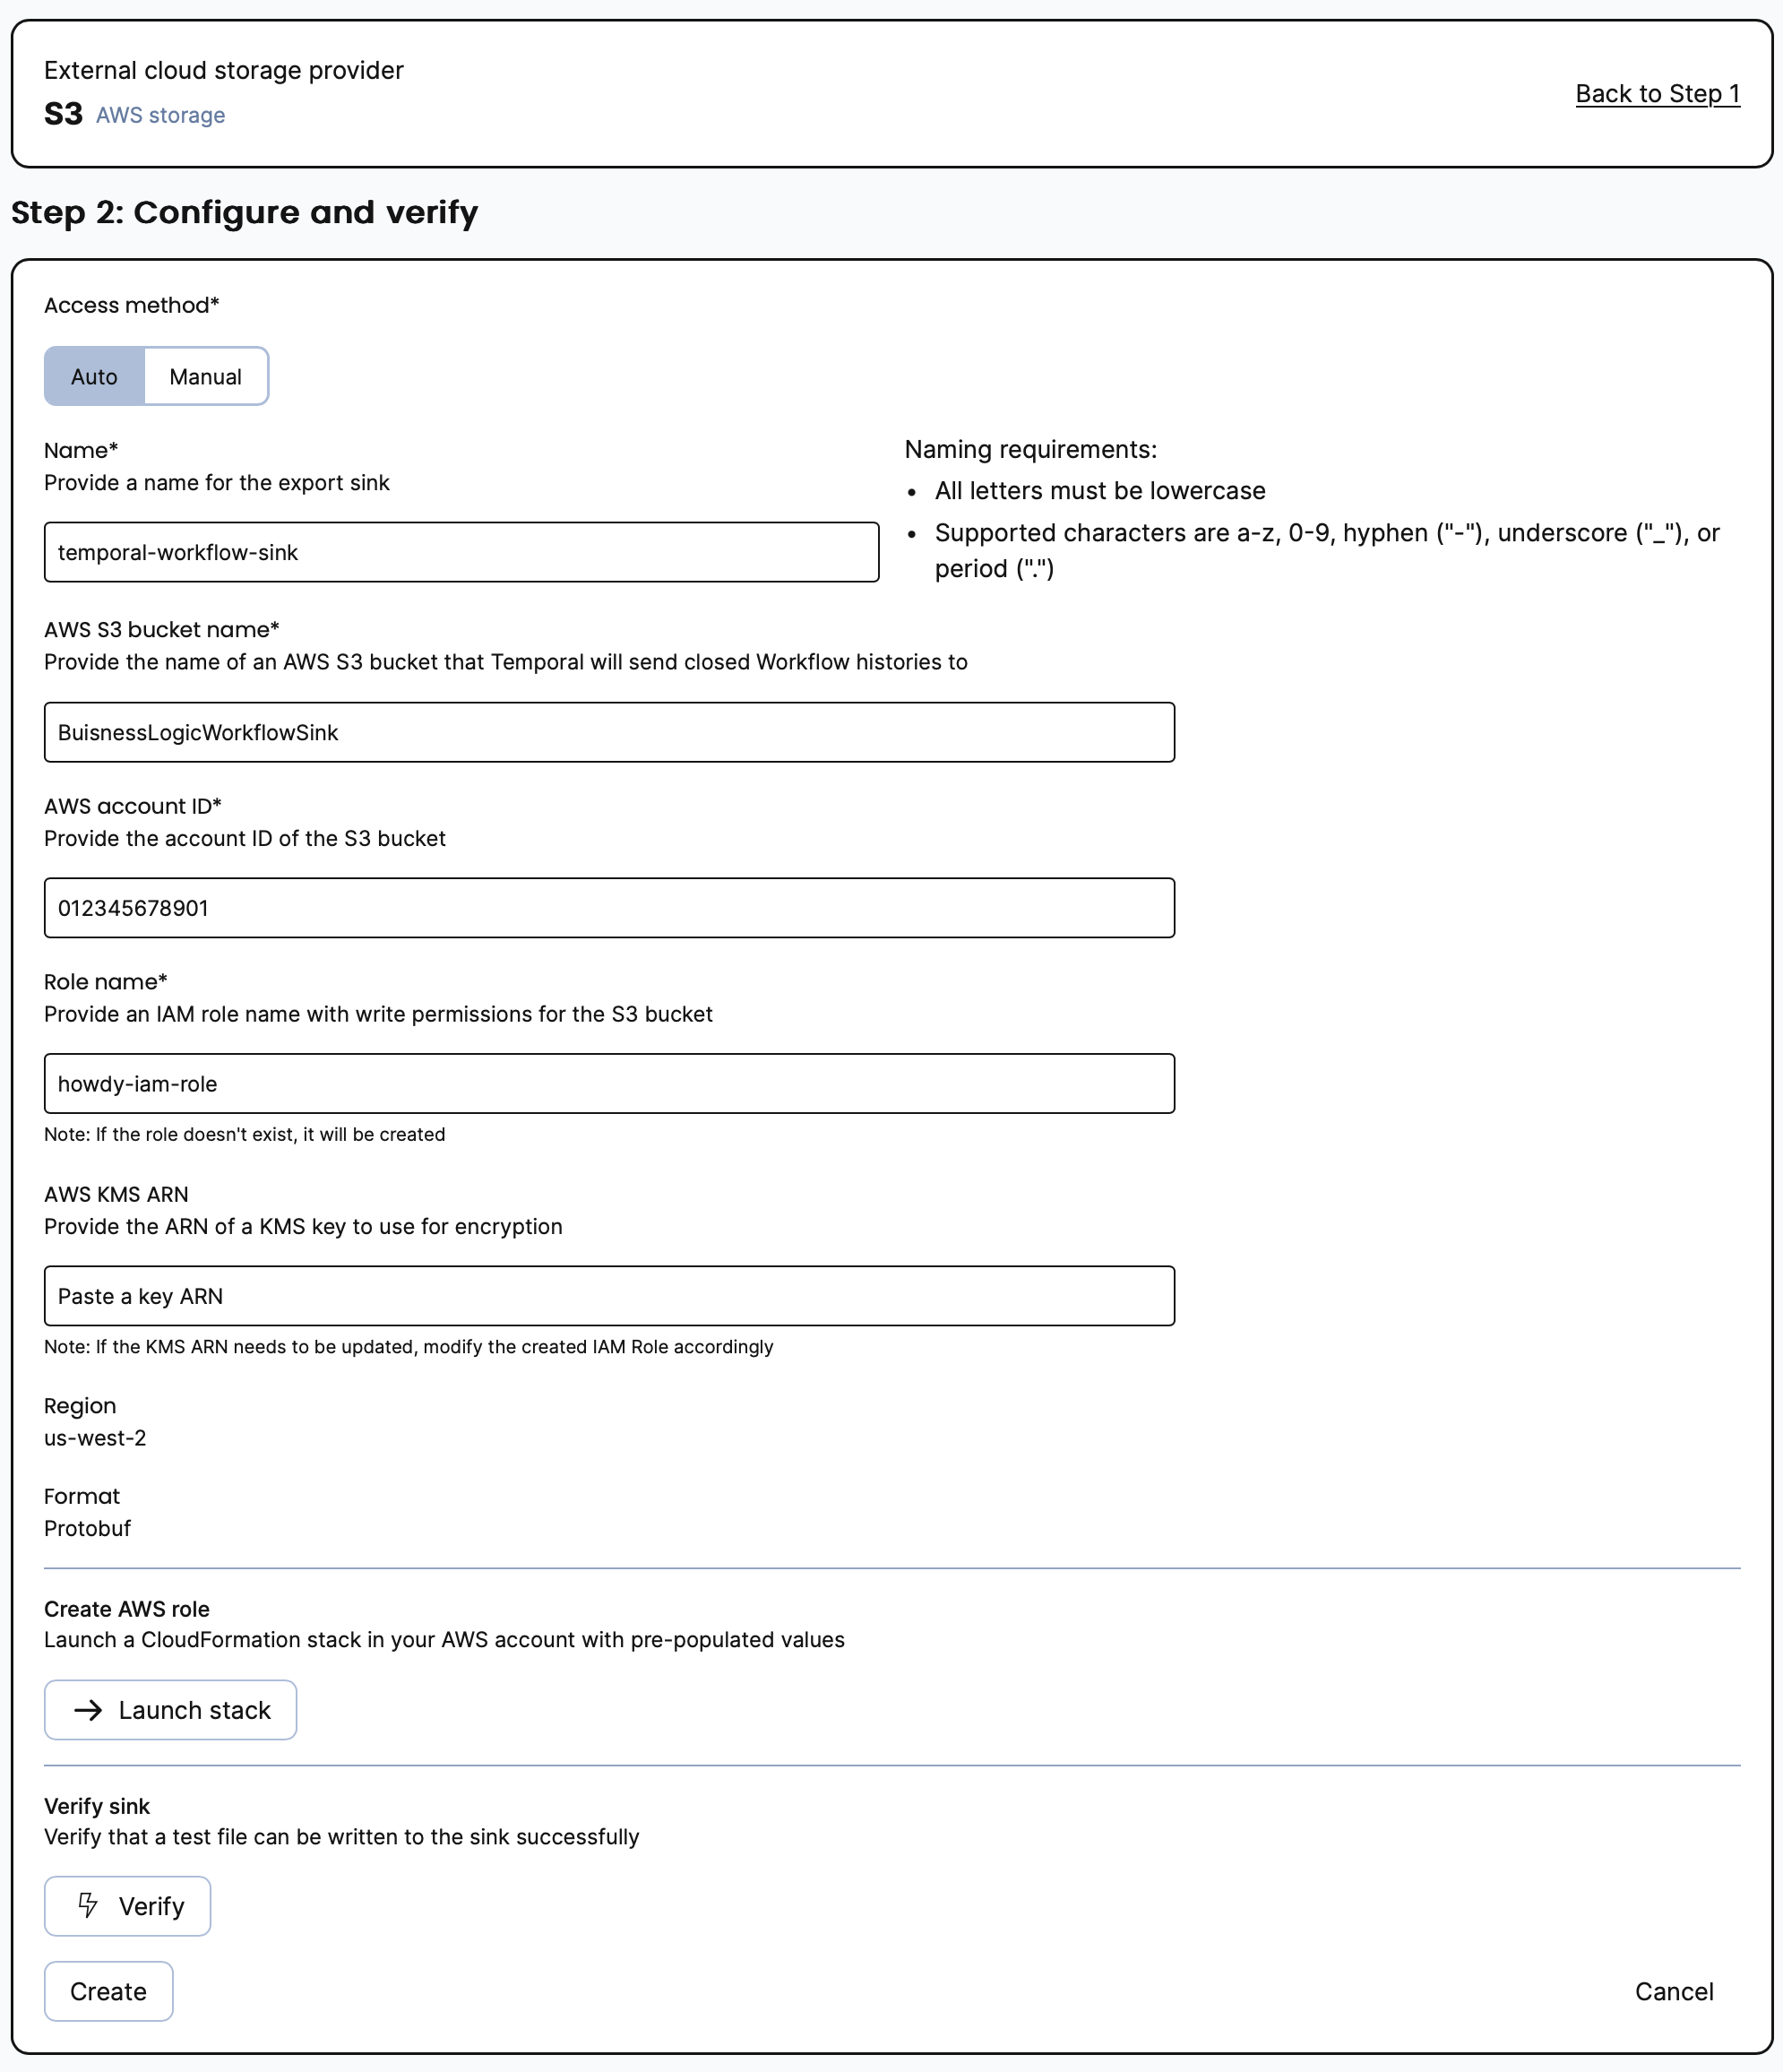
Automated setup
You can use the automated setup to create a CloudFormation stack with write permission to your S3 bucket. Make sure to verify the export setup before you save the configuration.
- Open the Temporal Cloud UI and navigate to the Namespace you want to configure.
- Select Configure from the Export card.
- Provide the following information to configure the export sink and then select Create and launch stack:
- Name: A name for the export sink.
- AWS S3 Bucket Name: The name of the configured AWS S3 bucket to send Closed Workflow Histories to.
- AWS Account ID: The AWS account ID.
- Role Name: The name of the AWS IAM role to use for the CloudFormation stack that has write permission to the S3 bucket.
- KMS ARN: (optional) The ARN of the AWS KMS key to use for encryption of the exported Workflow History.
- You will be taken to the CloudFormation Console to create the stack with pre-populated information.
- Review the information and then select Create stack.
Manual setup
You can manually configure a CloudFormation stack using the provided template.
- Open the Temporal Cloud UI and navigate to the Namespace you want to configure.
- Select Configure from the Export card.
- Select Manual from Access method.
- Enter the Template URL into your web browser to download your copy of the CloudFormation template.
- Configure the CloudFormation template for your export sink.
- Follow the steps in the AWS documentation by uploading the template to the CloudFormation console.
Using tcld
Run the tcld namespace export s3 create command and provide the following information.
--namespace: The Namespace to configure export for.--sink-name: The name of the export sink.--role-arn: The ARN of the AWS IAM role to use for the CloudFormation stack that has write permission to the S3 bucket.--s3-bucket-name: The name of the AWS S3 bucket.
For example:
tcld namespace export s3 create --namespace "your-namespace.your-account" --sink-name "your-sink-name" --role-arn "arn:aws:iam::123456789012:role/test-sink" --s3-bucket-name "your-aws-s3-bucket-name”
Retrieve the status of this command by running the tcld namespace export s3 get command.
For example:
tcld namespace export s3 get --namespace "your-namespace.your-account" --sink-name "your-sink-name"
The following is an example of the output:
{
  "name": "your-sink-name",
  "resourceVersion": "a6442895-1c07-4da4-aaca-58d57d338345",
  "state": "Active",
  "spec": {
    "name": "your-sink-name",
    "enabled": true,
    "destinationType": "S3",
    "s3Sink": {
      "roleName": "your-export-test",
      "bucketName": "your-export-test",
      "region": "us-east-1",
      "kmsArn": "",
      "awsAccountId": "123456789012"
    }
  },
  "health": "Ok",
  "errorMessage": "",
  "latestDataExportTime": "0001-01-01T00:00:00Z",
  "lastHealthCheckTime": "2023-08-14T21:30:02Z"
}